How to make a gingerbread beach shack, with a fondant beer cooler
- Share via
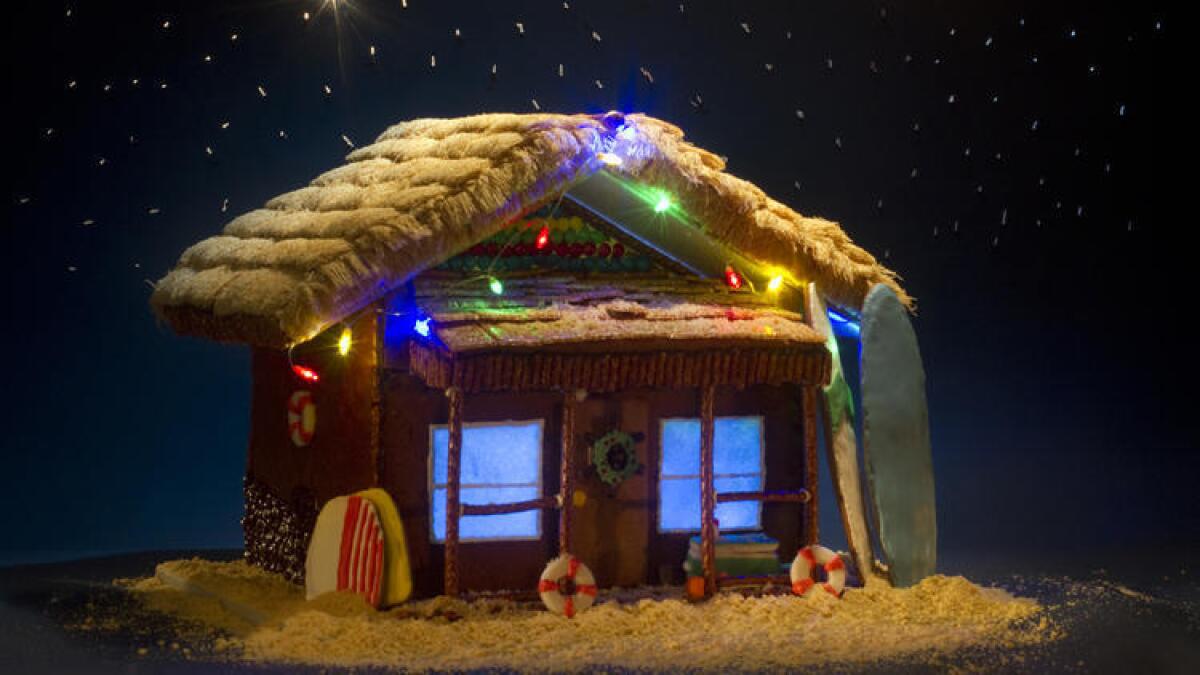
For many of us, gingerbread houses are as much a part of Christmas as decorated trees and candy canes. Whereas some people vary the traditional ski chalet or wood cabin by turning their gingerbread houses into cathedrals, castles, Hogwarts or Downton Abbey, we decided to make a gingerbread surf shack this year. Maybe blame the lack of snow in Southern California, at least at sea level.
Never made a gingerbread house? No worries. It can be a lot of fun. However simple or intricate you decide to make it is your decision, just adjust the project to suit your skill level and OCD tendencies — we certainly won’t judge. And even though the components are technically edible, remember that a gingerbread house is mostly for decoration — nobody really wants to eat something that’s sat out on display for days, or longer.
SIGN UP for the free In the Kitchen newsletter >>
There are a few things to keep in mind before constructing your gingerbread house. First, look for a durable cookie recipe that won’t crumble — you will want something stronger than your average gingerbread cookie. For an industrial-strength dough, add additional flour, as much as twice what the standard cookie recipe calls for, or more. And because these cookies won’t be eaten, you can save money by skipping some of the more expensive ingredients. Substitute shortening for butter and skip the eggs.
If you want your gingerbread house to double as a holiday air freshener, bump up the spices — a lot.
Next, plan to make plenty of royal icing — it’s nothing more than a basic combination of powdered sugar and egg whites. Simple as it may sound, royal icing has the strength of glue when it dries; this is no ordinary frosting. Use plenty of icing to construct the house; it will act as your cement and help hold everything together. Then continue to use it to pipe decorations or glue on candies or other embellishments. Just be sure to keep the icing covered when it’s not in use. Royal icing dries quickly, so keep the surface covered with a layer of plastic wrap or store the icing in sealed piping bags.
If you’re worried about stability, and you may be if you’ve seen the meme going around on social media of a destroyed gingerbread house with a toy dinosaur (the caption usually reads: “When your gingerbread house fails … add dinosaur”), then consider building your house around some sort of structural support. You could use a repurposed tissue box or cereal box when building a basic house. Or consider using craft foam sheets, available at arts and crafts supply stores, for more elaborate creations. The internal framing will help carry the weight of your creation — so you don’t need to worry about sci-fi elements.
Finally, don’t rush it — give yourself plenty of space and time. Because this should be fun. Have any available older kids help with the construction while the younger kids (or overly obsessive adults) can focus on fine-tuning the decorations. Remember, gingerbread houses can never have too much confectionary bling.
Built right, your gingerbread house could last for years. And if anyone starts nibbling a little too much on your pretzel porch or fondant beer cooler, you can always add that dinosaur.
::
How to make sure you have the best gingerbread house on the block
There are many ways to trick out your gingerbread house. Here’s what we did:
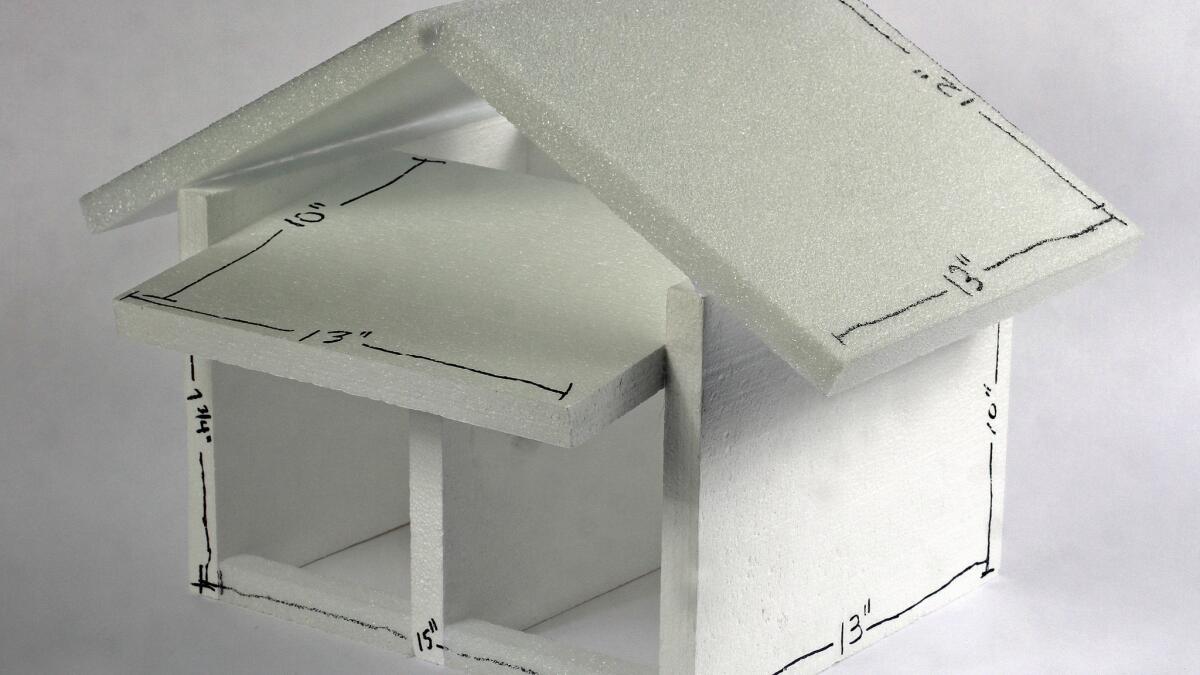
Step 1: Construct your structural support. Purchase craft foam sheets from your local craft store, which you can cut using a box cutter and assemble with a hot-glue gun. Add a string of clear LED lights to the inside of the structure so the windows can light up after the shack is constructed.
Step 2: Cardboard cutouts. To make sure you have the desired shapes, make cardboard cookie cutouts. These include four rectangles: No. 1 (13 by 10 inches), No. 2 (13 by 12 inches), No. 3 (15 by 10 inches), No. 4 (15 by 73/4 inches); and two triangles: No. 5 (15 by 81/2 by 81/2 inches), No. 6 (13 by 81/2 inches by 81/2 inches).
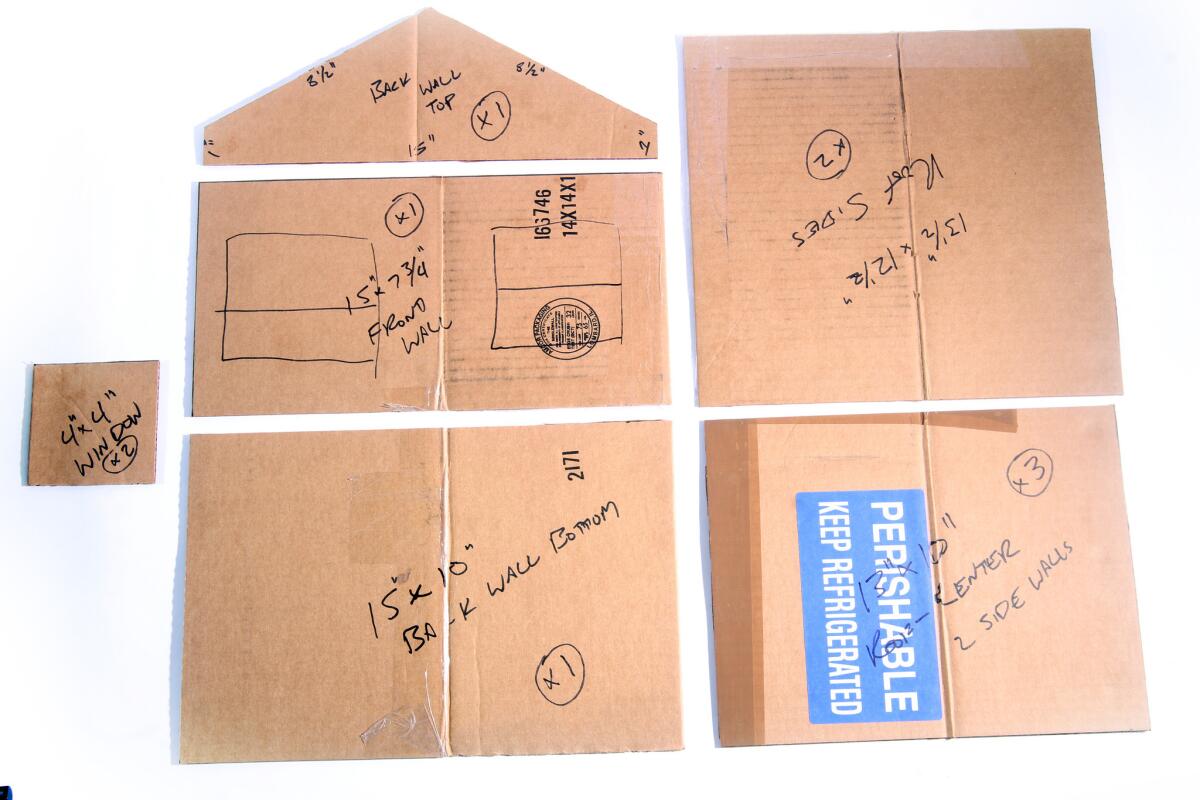
Step 3: Bake the cookies. Bake three of No. 1, two of No. 2, one of No. 3, one of No. 4 (we also cut out two windows for this piece), and one each of Nos. 5 and 6. You will go through almost 6 batches of dough to construct the shack, along with extra to bake a door, a strip for the top of the roof, and surfboard and boogie board decorations.
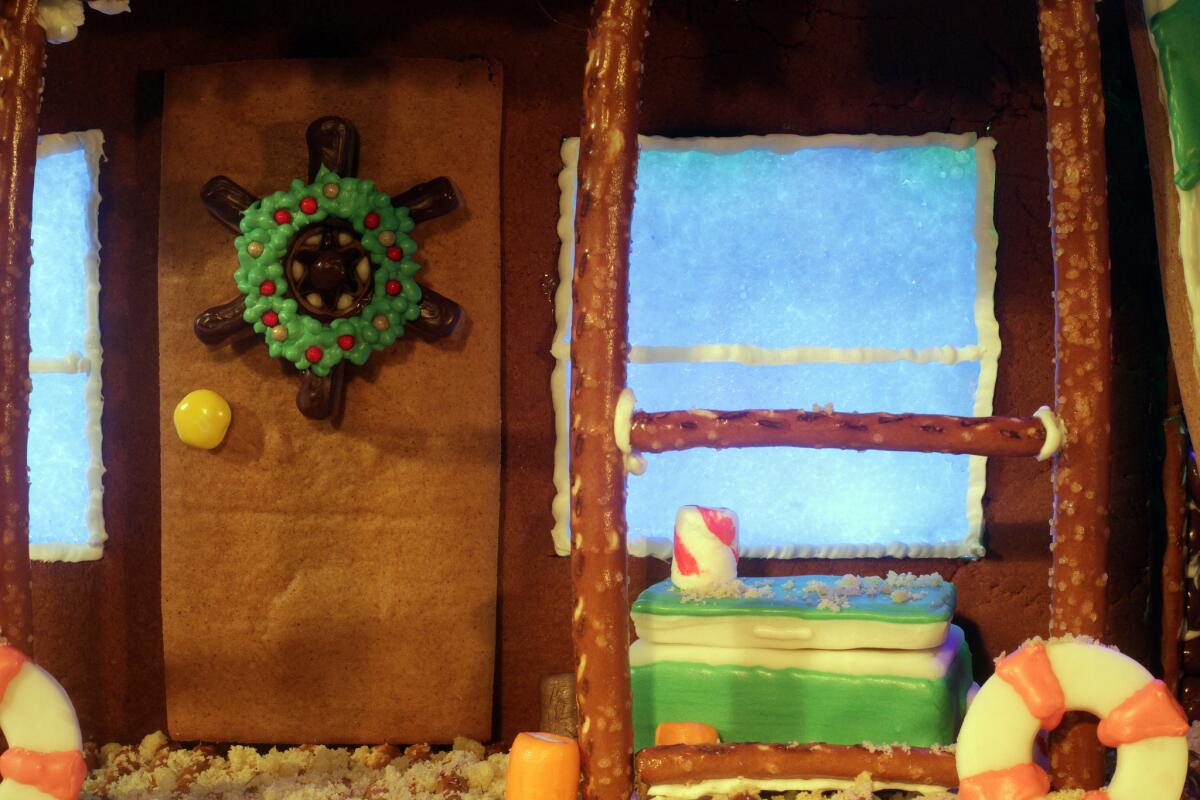
Step 4: Make the sugar windows. Cook about 3 cups of sugar with some water (enough to give the sugar a wet sand consistency) and a teaspoon of corn syrup on the stove-top until the sugar reaches “hard crack” stage (300 degrees). As soon as the sugar reaches the right temperature, add a little blue food coloring and pour it into the “windows” of the baked No. 4 cookie.
Step 5: Assemble the house. Glue the cookie pieces over the craft foam structure using either royal icing or a hot glue gun (use the hot glue gun only if the finished piece will not be eaten). If the pieces are a little mismatched, they can be filed using a Microplane or sandpaper. Seal corners and gaps between pieces using pretzel rods.
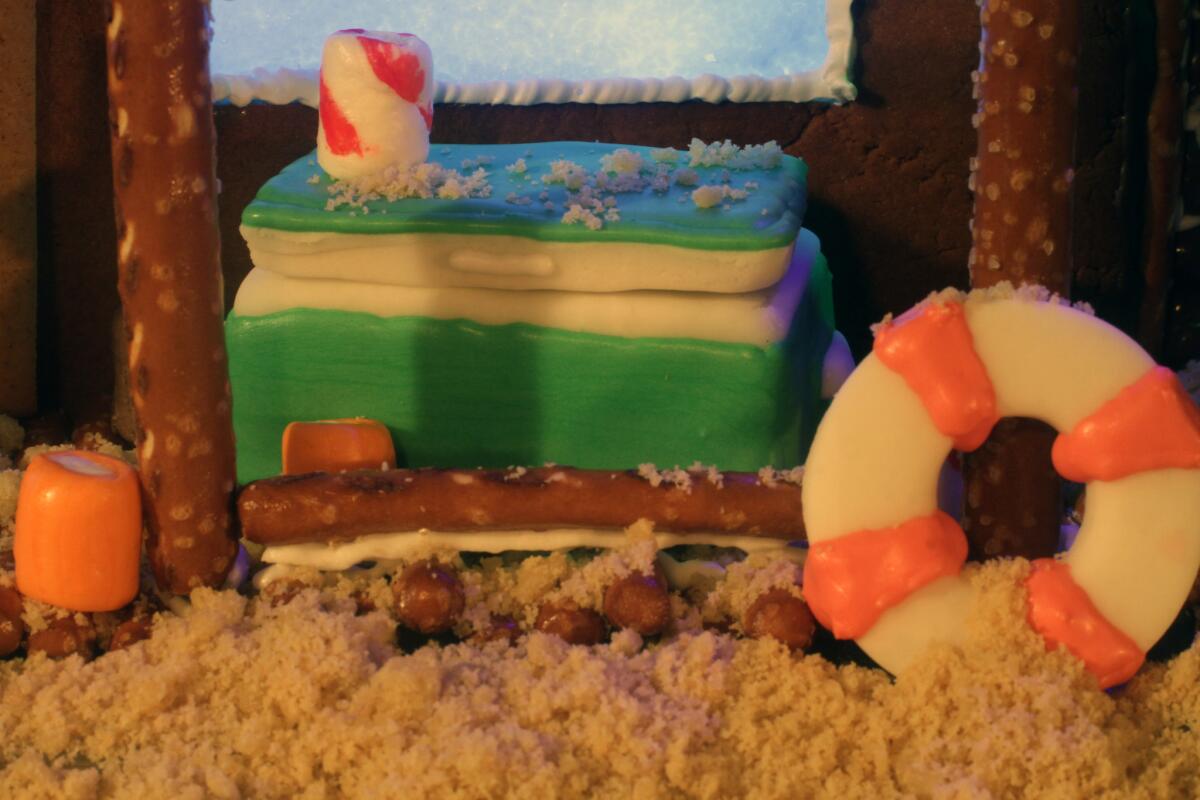
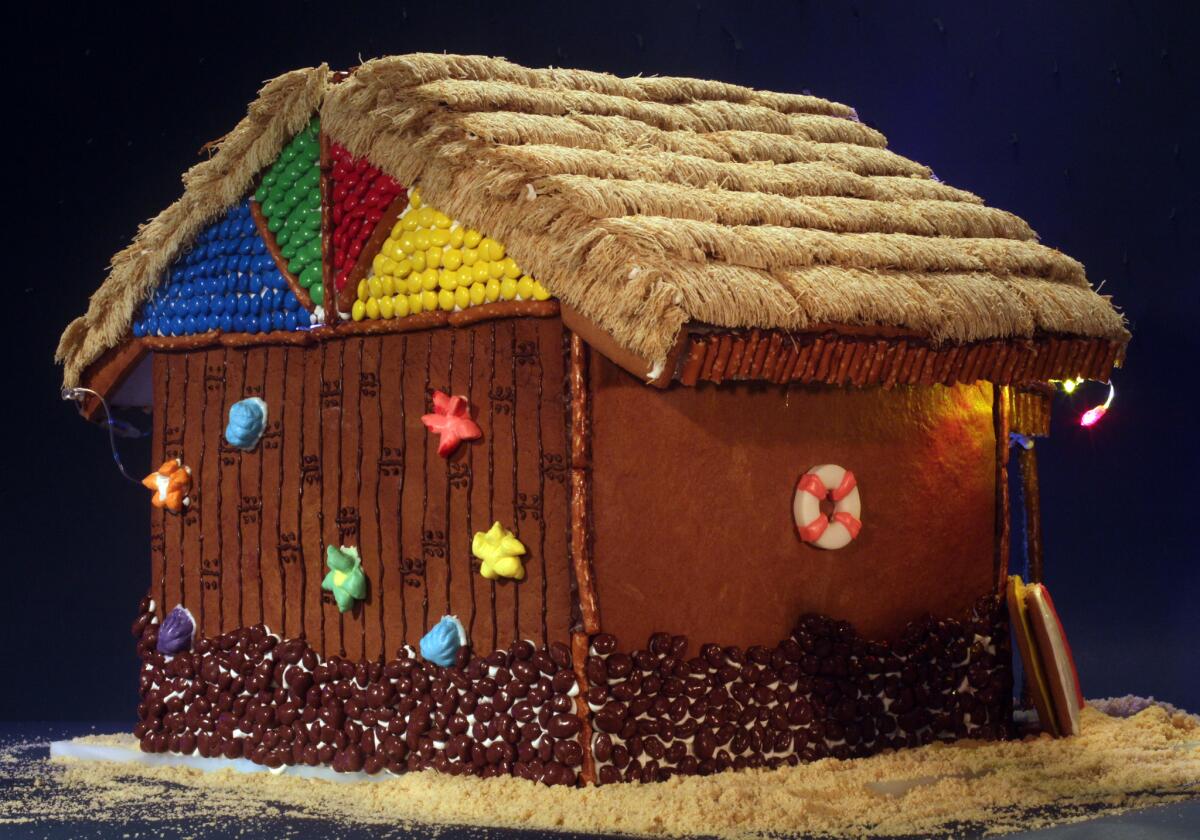
Step 6: Decorate. Use original Shredded Wheat cereal squares to construct the “thatch” roof and sesame candy pieces for the porch roof. The porch can be constructed of pretzel rods, and the fake “rocks” on the side walls can be added using Raisinets and royal icing. Chocolate and royal icing are used for the detail work, and prepared rolled fondant is molded into the cooler and life preservers. Salt water taffy candies are molded into the shellfish and starfish on the back wall of the shack, as well as the cans on the porch. The “sand” can be created using ground sugar cookies.
------------
For the record: An earlier version of this story said salt water toffee candies are used to make the shellfish and starfish. The candies are salt water taffy.
------------
Twitter: @noellecarter
More to Read
Eat your way across L.A.
Get our weekly Tasting Notes newsletter for reviews, news and more.
You may occasionally receive promotional content from the Los Angeles Times.
